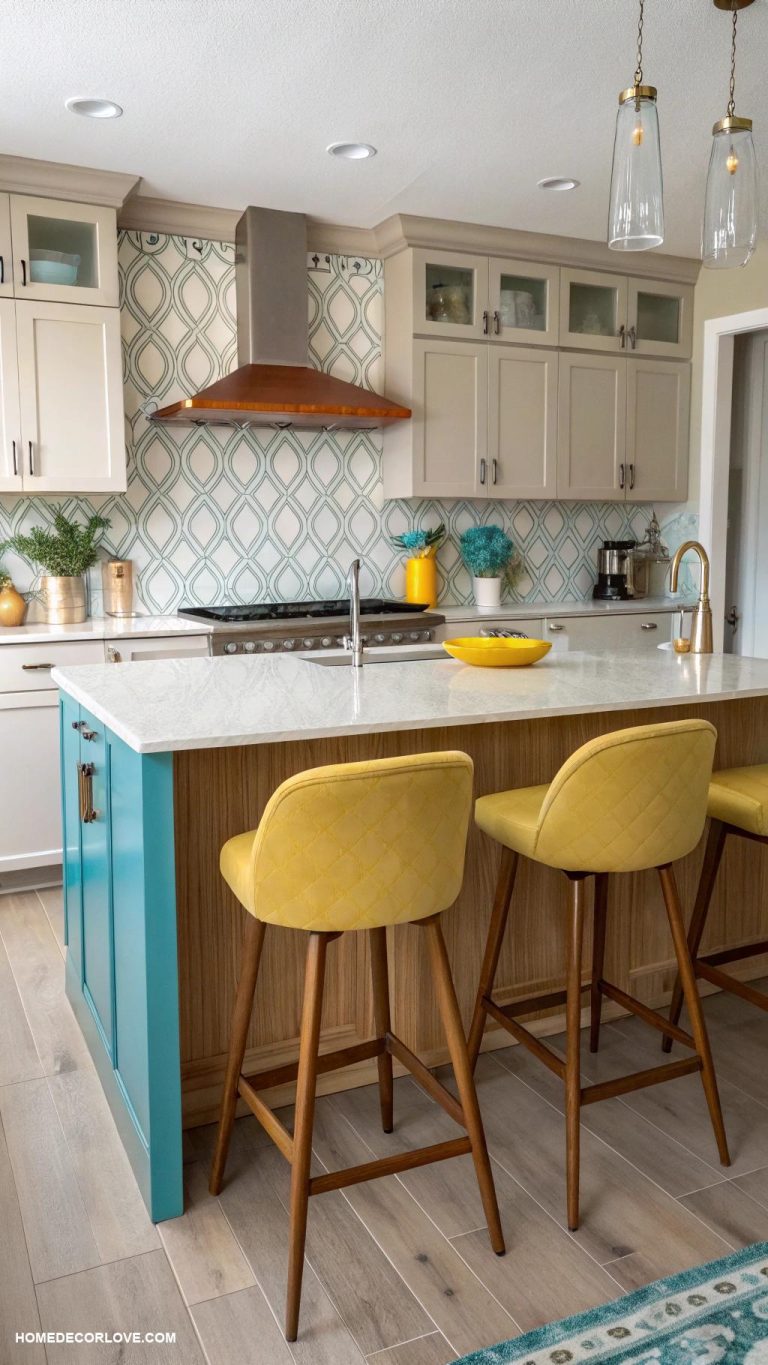
10 Kitchen Backsplash with White Cabinets Ideas to Brighten Up Your Cooking Space
We may earn a commission through all links on this website. As an Amazon Associate, we earn from qualifying purchases.When it comes to designing a kitchen that exudes elegance and sophistication, the combination of white cabinets and a stunning backsplash is a match made in heaven. The crisp, clean lines of white cabinets provide a beautiful backdrop for a wide range of backsplash styles, from sleek and modern to rustic and ornate.
In this article, we’ll explore some of the most popular kitchen backsplash ideas that pair perfectly with white cabinets, from bold and bright colors to subtle and understated patterns. Whether you’re looking to create a cohesive and streamlined look or add a pop of personality to your kitchen, we’ve got you covered.

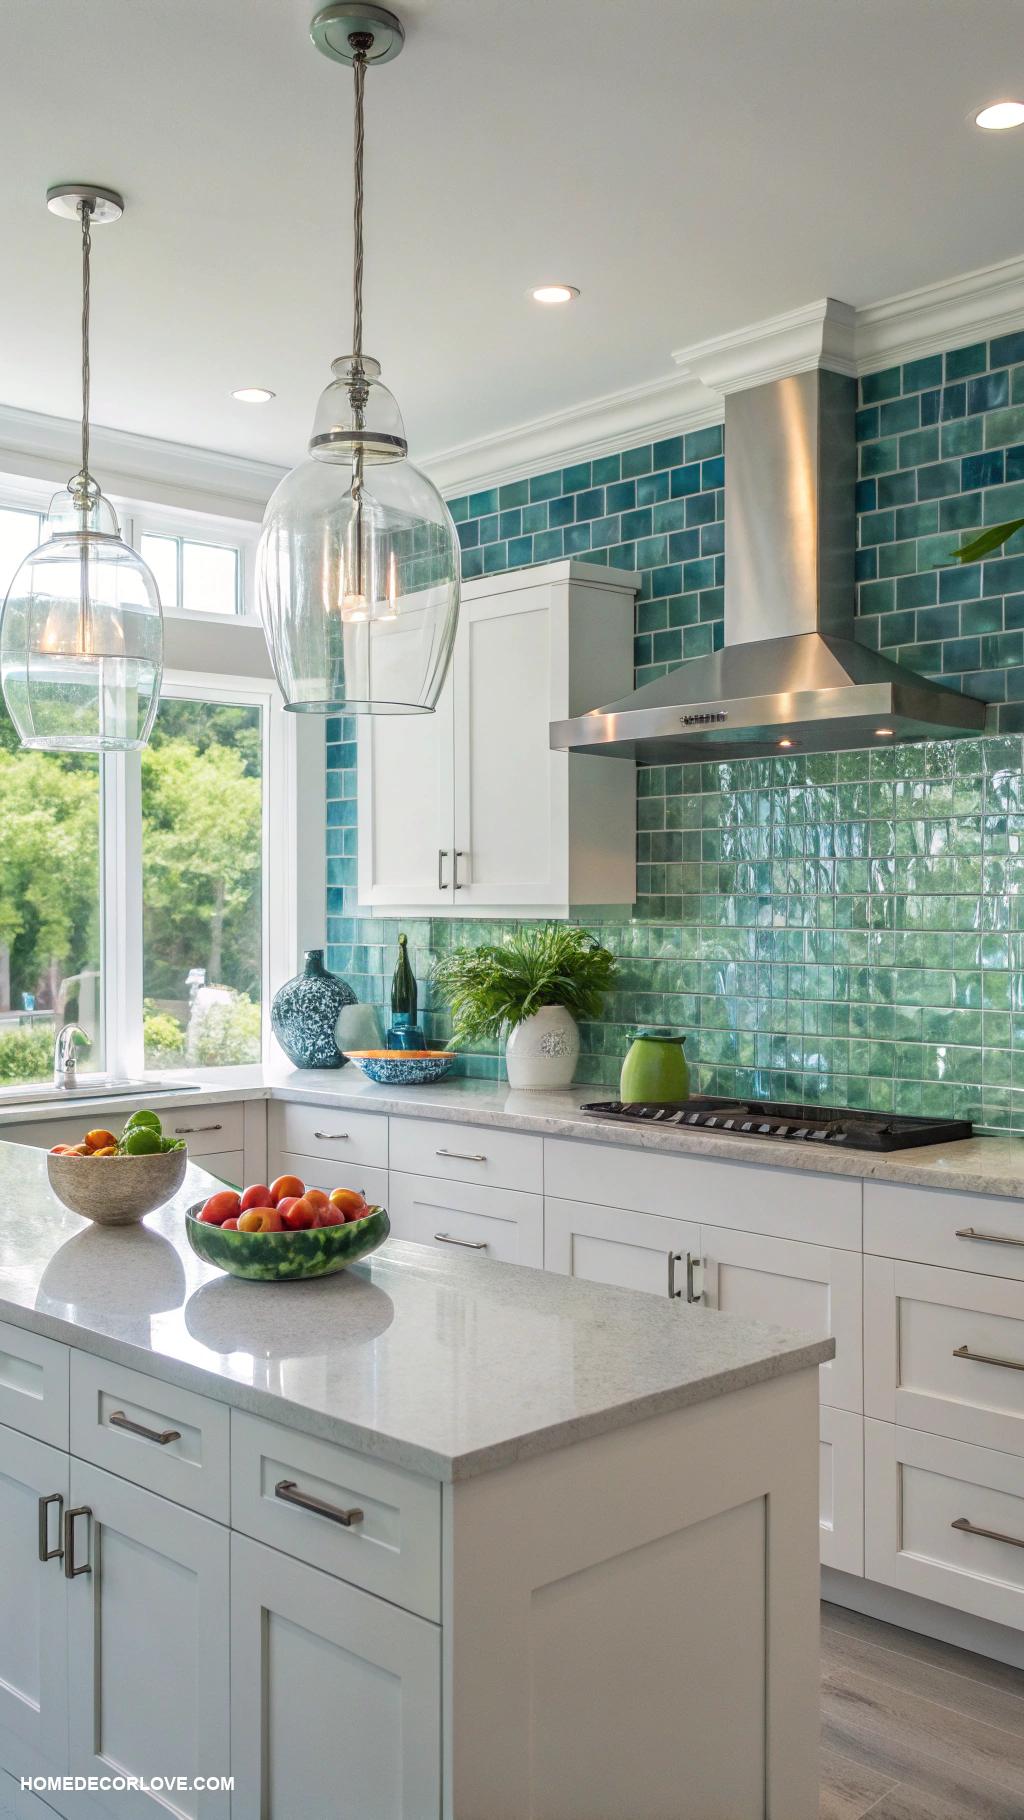
Classic Subway Tiles in Glossy White
Classic subway tiles in glossy white create a timeless and elegant look for any kitchen backsplash. Their smooth surface reflects light beautifully, enhancing the airy feel of the space, especially when paired with white cabinets. This combination not only adds a sense of cleanliness but also complements various decor styles, making it a versatile choice for homeowners.
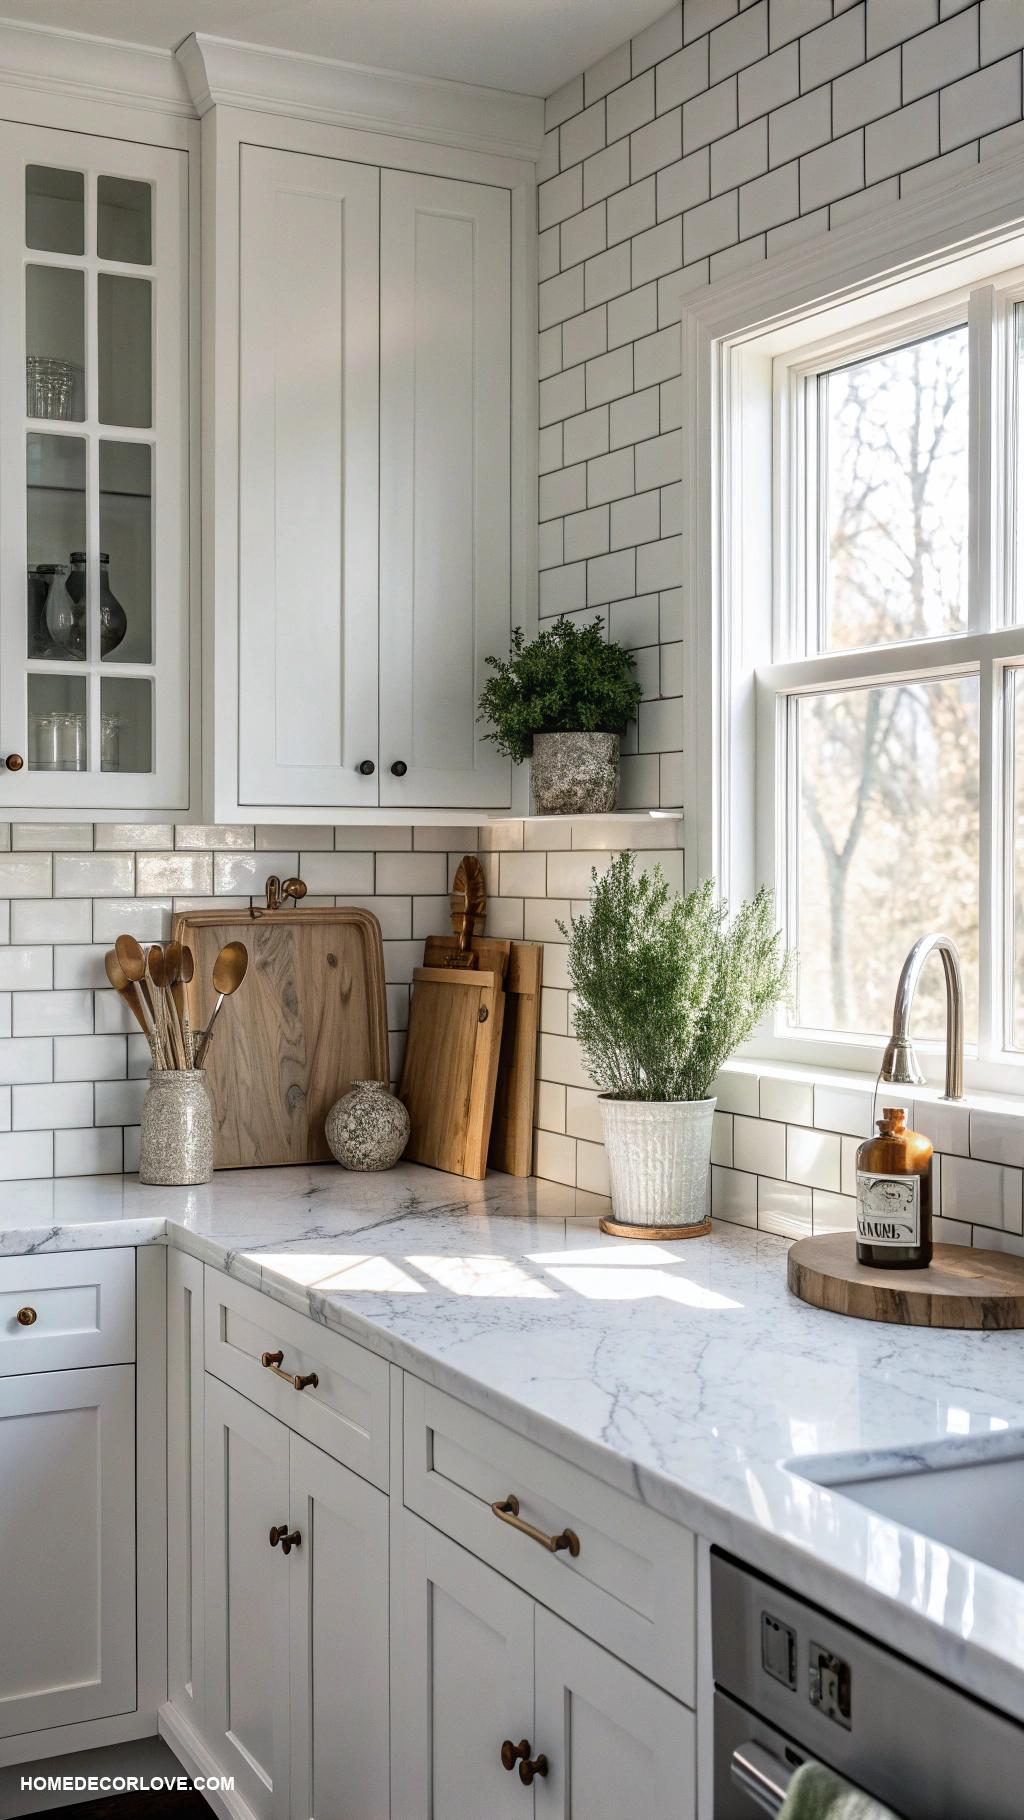
To achieve this classic look in your home, start by selecting glossy white subway tiles that fit your personal style and space. Measure the area where you will install the backsplash, and purchase enough tiles along with adhesive, grout, and other necessary materials. Clean the wall surface, apply adhesive in sections, and carefully place the tiles, ensuring they are straight and evenly spaced. After the adhesive has cured, apply grout, wiping away excess for a polished finish. Finally, seal the grout if needed to protect against moisture and stains.
Marble Look Tiles for Elegant Touch
Marble look tiles offer a luxurious and sophisticated touch to any kitchen backsplash, providing an elegant contrast against white cabinets. These tiles mimic the natural beauty of real marble, featuring stunning veining and a polished finish that enhances the overall aesthetic of your space. Incorporating marble look tiles not only elevates your decor but also adds a timeless quality to your kitchen.
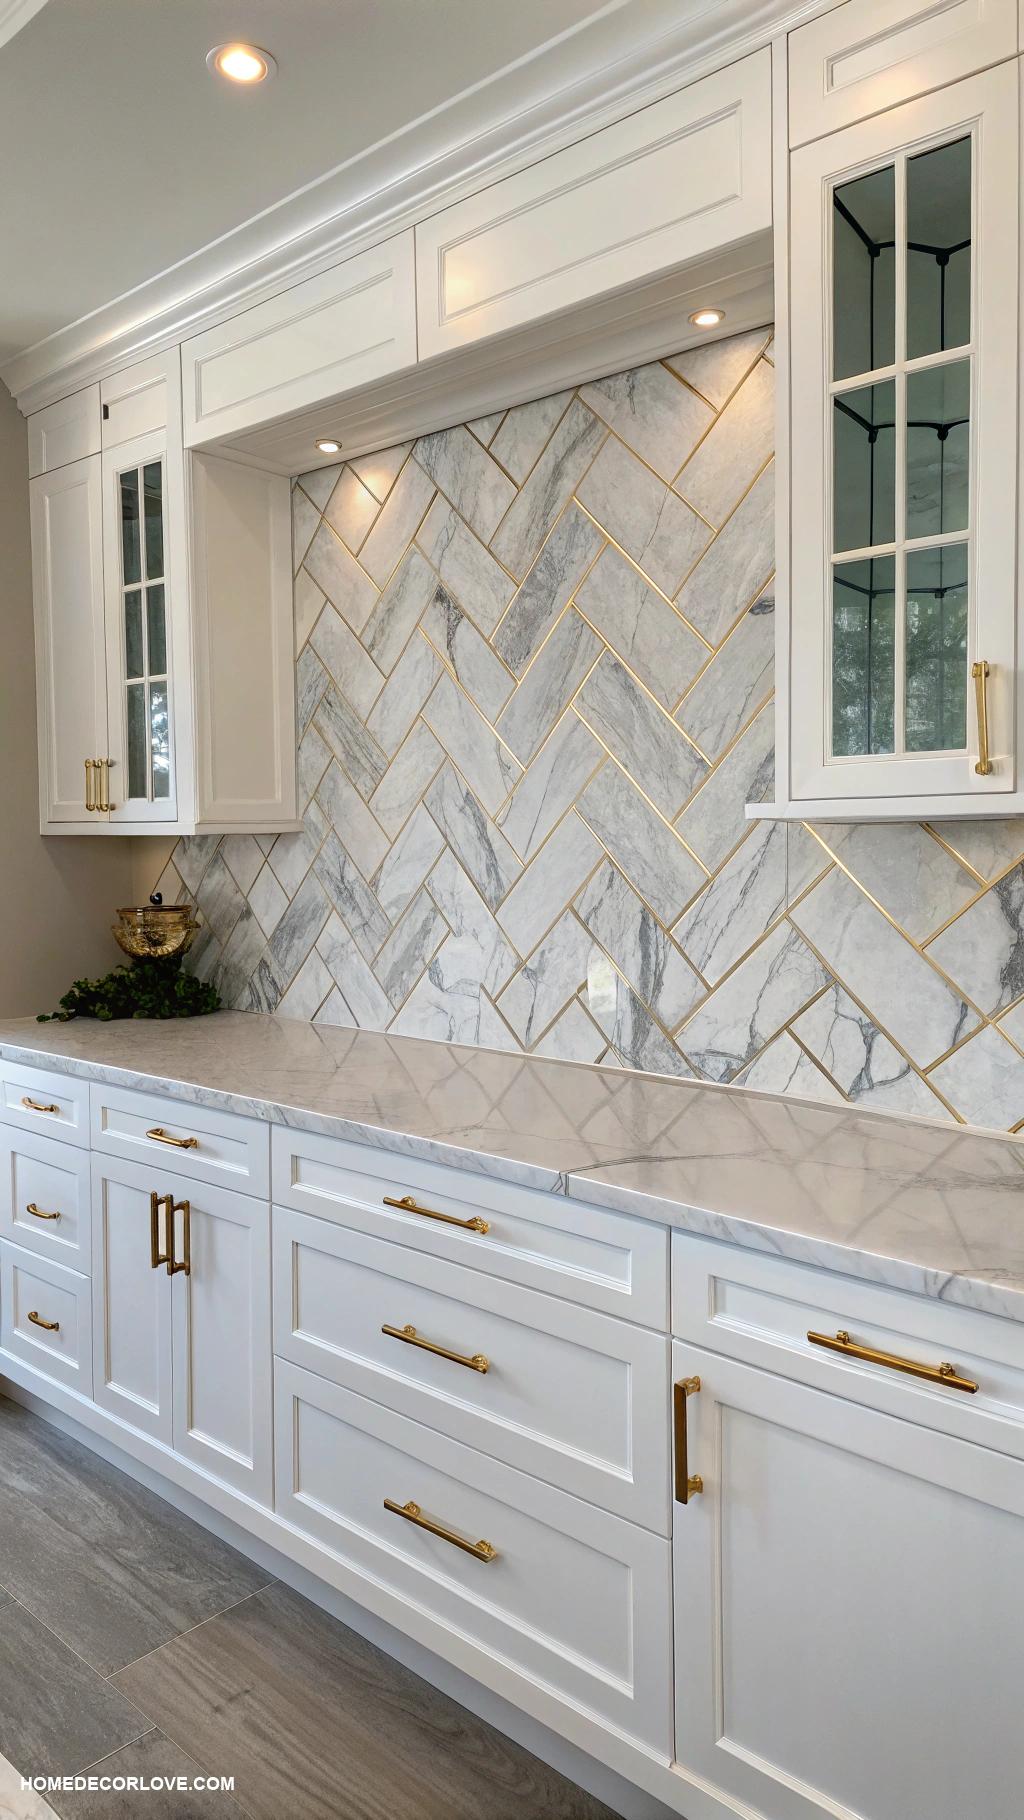
To achieve this look in your home, start by selecting high-quality marble look tiles that complement your kitchen’s color scheme. Prepare the wall by cleaning it thoroughly and ensuring it’s smooth. Use a thin-set adhesive to carefully place the tiles in your desired pattern, allowing for grout lines between each tile. Once the adhesive has set, apply a grout that matches the tiles for a seamless appearance. Finally, seal the grout to protect it from moisture and stains, and enjoy your stunning new backsplash.
Glass Tiles for Modern Shine
Glass tiles are a fantastic choice for adding a modern shine to your kitchen backsplash, especially when paired with white cabinets. Their reflective surfaces enhance light and create a bright, airy feel in the space. Available in a variety of colors and patterns, they offer versatility and a touch of elegance to your home decor.
1. Start by measuring the area of your backsplash to determine how many tiles you will need. 2. Choose glass tiles that complement your kitchen’s color scheme; consider shades that will either match or contrast nicely with your white cabinets. 3. Prepare the wall surface by cleaning it thoroughly and applying a suitable adhesive. 4. Lay out the tiles on the floor first to visualize the design. 5. Begin installing the tiles from the center of the backsplash, using spacers for even gaps. 6. After the tiles are set, allow the adhesive to dry completely, then apply grout between the tiles, and wipe off any excess. 7. Finally, seal the grout to protect it from moisture and ensure a lasting finish.
Geometric Patterned Tiles in Soft Colors
Geometric patterned tiles in soft colors add a modern and stylish touch to any kitchen backsplash. Paired with white cabinets, these tiles create a refreshing and contemporary look that complements various decor styles. The subtle tones of the tiles enhance the overall ambiance of the space, making it feel inviting and cheerful.
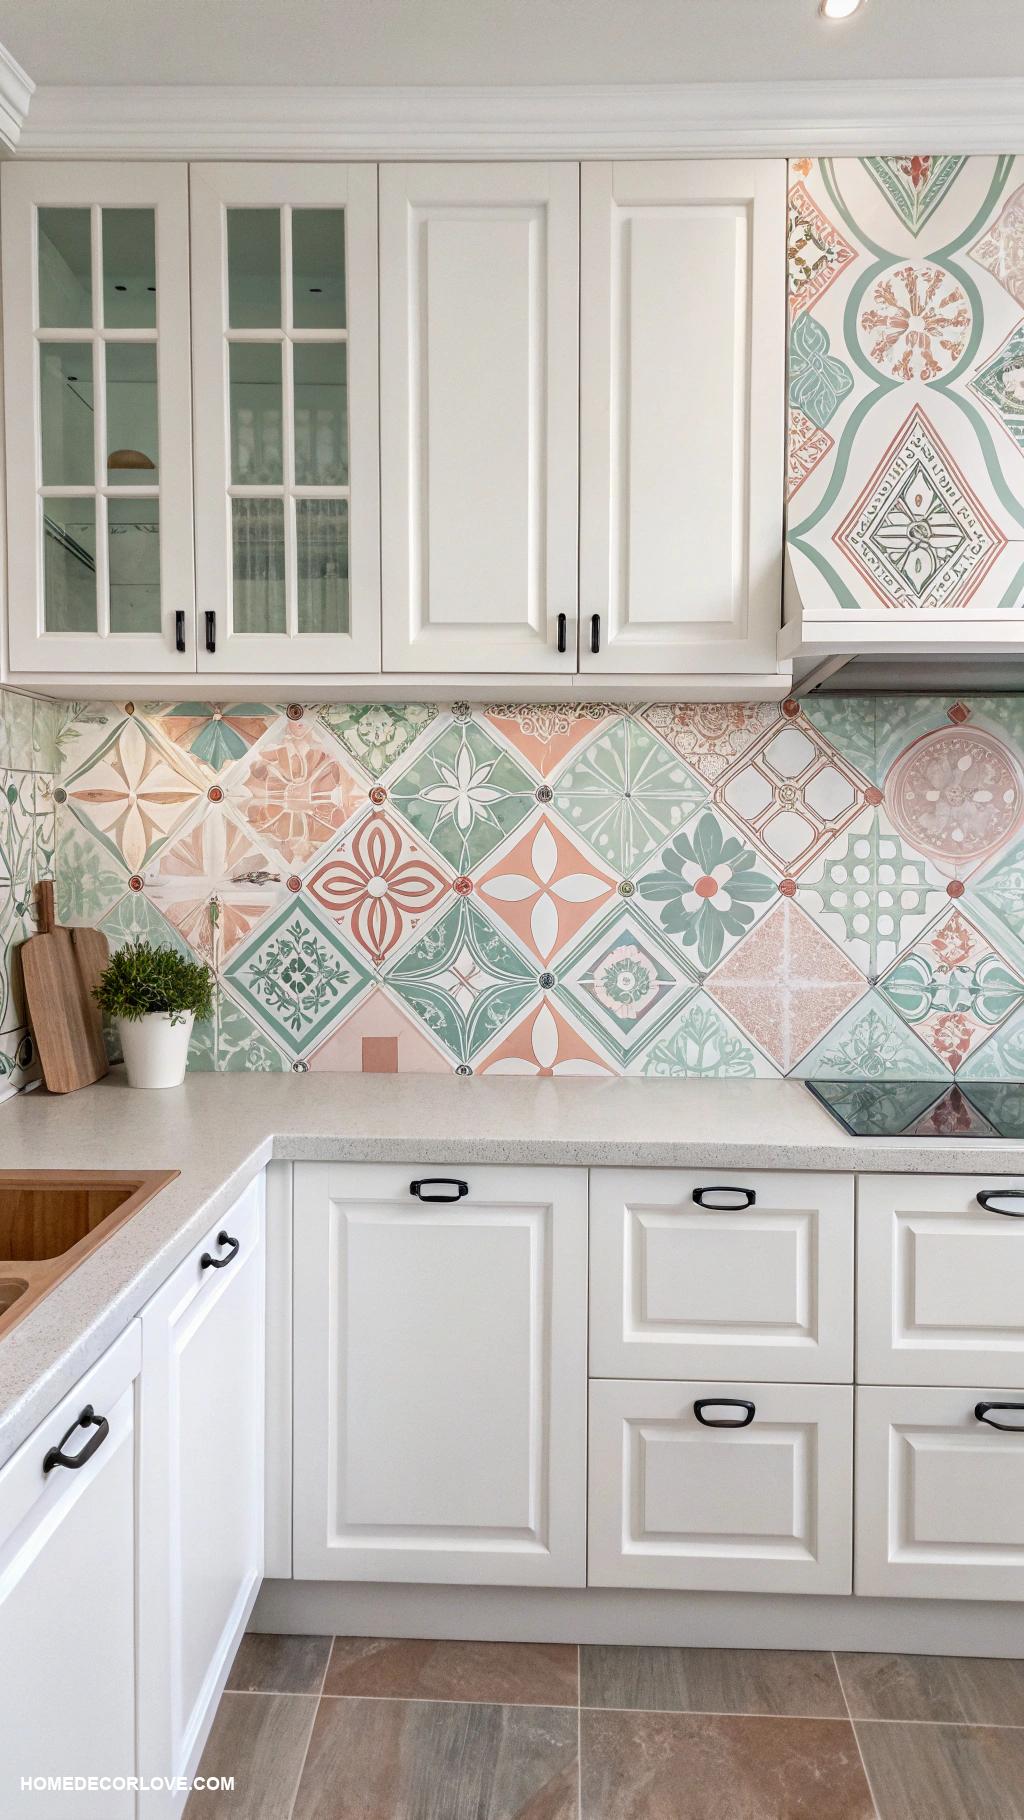
1. Choose a geometric tile design in soft colors that matches your kitchen aesthetic. 2. Measure your backsplash area to determine how many tiles you will need. 3. Prepare the surface by cleaning it thoroughly and applying a suitable adhesive. 4. Begin laying the tiles from the center of the backsplash, working your way outwards to ensure a balanced pattern. 5. Use spacers between the tiles to maintain even gaps for grouting. 6. Once all tiles are laid, allow the adhesive to set as per the manufacturer’s instructions. 7. Apply grout to the spaces between the tiles and wipe off excess with a damp sponge. 8. Finish by sealing the grout for long-lasting durability.
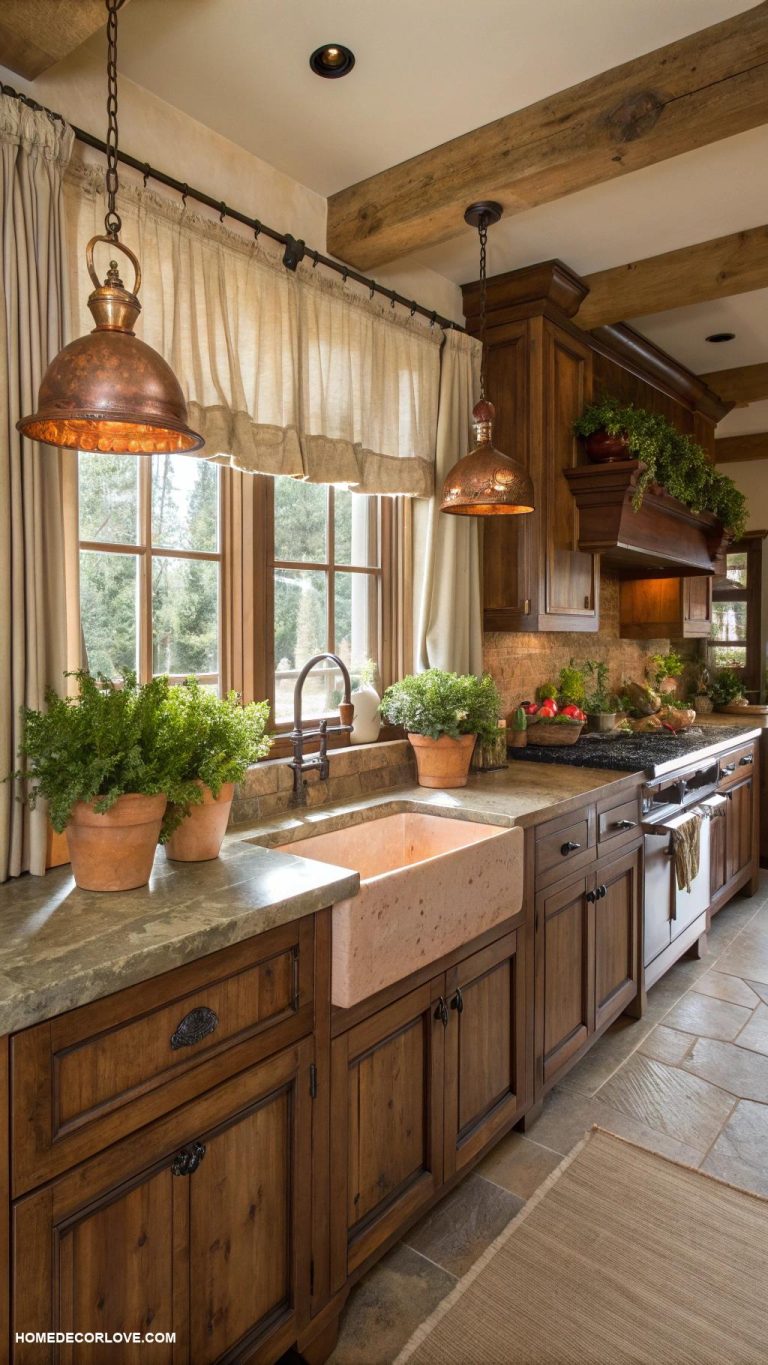
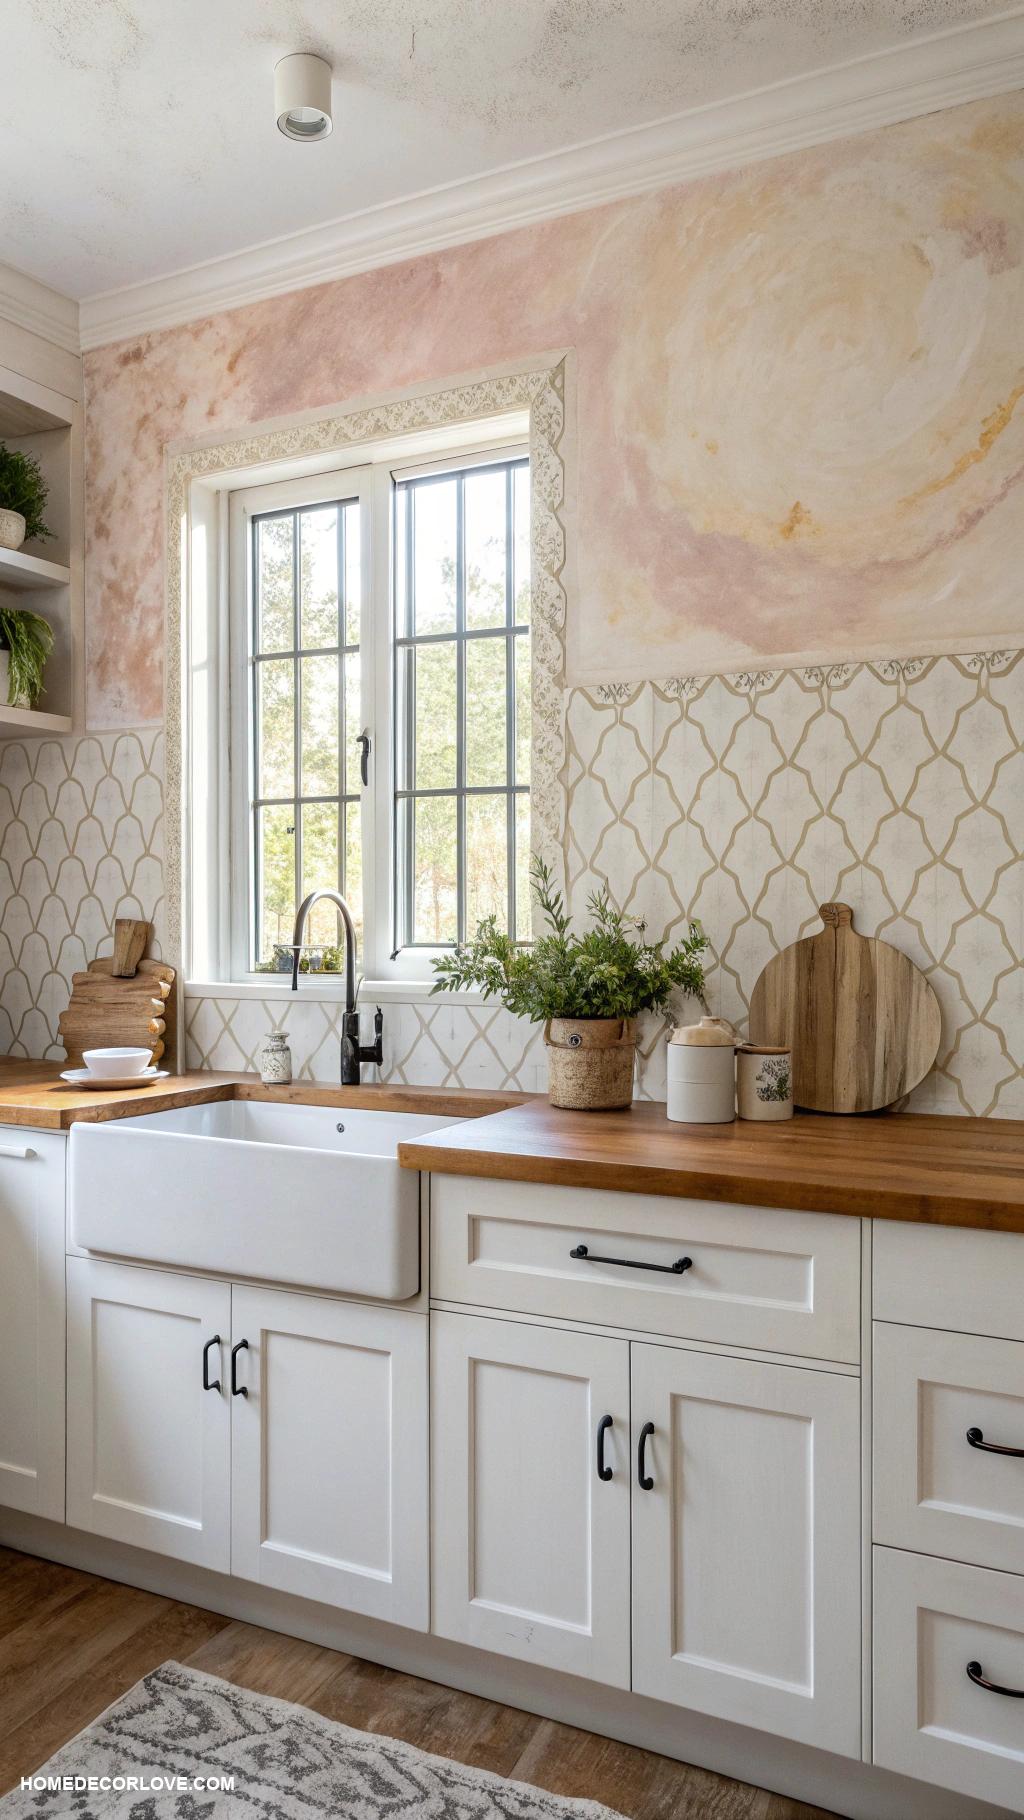
Natural Stone for Rustic Appeal
Natural stone adds a timeless and rustic appeal to your kitchen backsplash, creating a warm and inviting atmosphere that complements white cabinetry beautifully. The unique textures and colors of stone can enhance the overall design, providing both visual interest and durability. Whether you choose slate, granite, or limestone, natural stone can transform your kitchen into a cozy and stylish space.
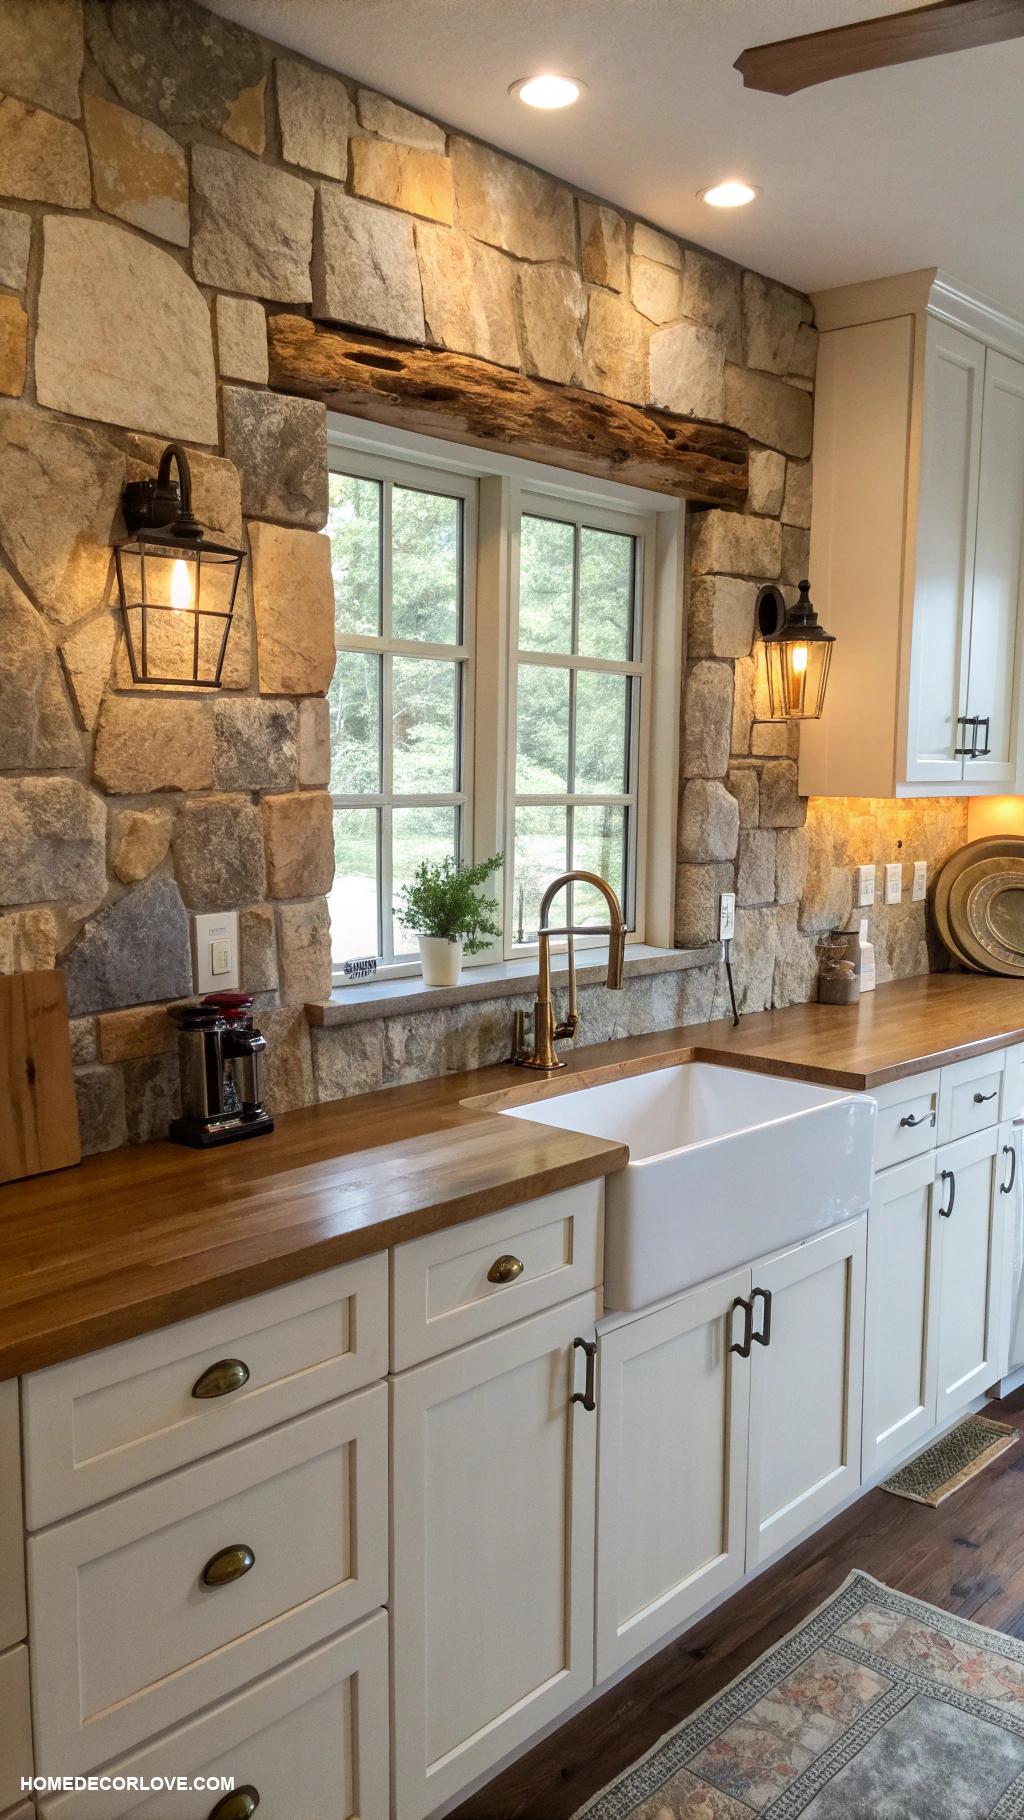
1. Start by selecting the type of natural stone you want for your backsplash, considering factors like color and texture. 2. Measure the area to determine how much stone you’ll need and purchase the appropriate amount. 3. Prepare the wall by cleaning and applying a suitable adhesive. 4. Lay out the stones in your desired pattern before adhering them to the wall for a preview. 5. Begin placing the stones one by one, using spacers for uniform gaps and ensuring a proper fit. 6. After the stones are installed, apply grout to fill the spaces, wipe off excess, and allow it to cure. 7. Finally, seal the stone to protect it from moisture and stains, completing the rustic look of your kitchen.
Bold Colored Tiles for Contrast
Bold colored tiles can transform a kitchen backsplash into a striking focal point, providing a vibrant contrast to white cabinets. These tiles not only add personality and warmth to the space but also create a refreshing visual appeal that balances modern design with classic elements. Choosing the right color can enhance the overall aesthetic while reflecting your personal style and taste.
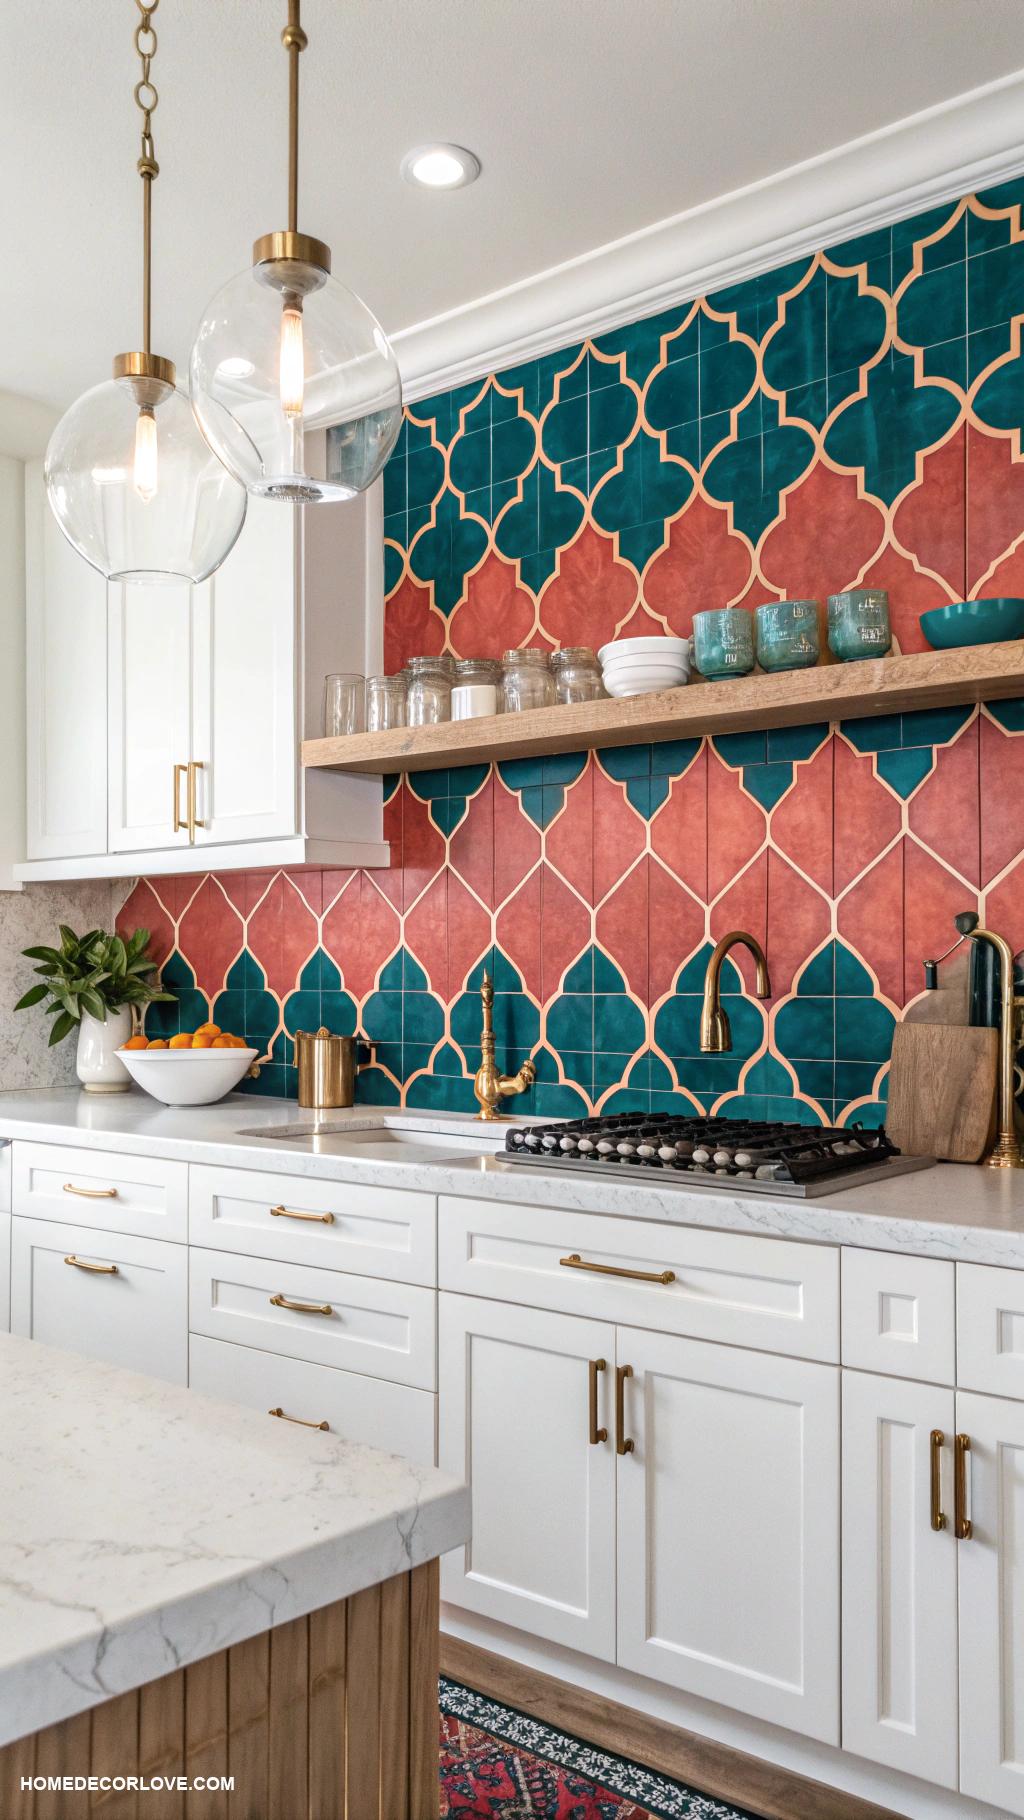
1. Start by selecting bold-colored tiles that complement your overall kitchen theme. Consider shades like deep blues, emerald greens, or fiery reds for maximum impact. 2. Measure the area of your backsplash to determine how many tiles you’ll need. 3. Prepare the surface by cleaning it thoroughly and applying a suitable adhesive for tile installation. 4. Begin placing the tiles from the center, ensuring even spacing and alignment. 5. Once all tiles are in place, let the adhesive dry, then apply grout in a contrasting or complementary color to finish the look. 6. Seal the grout after it has dried to protect it from stains and moisture.
Metallic Tiles for Industrial Vibe
Metallic tiles add a striking industrial vibe to any kitchen space, especially when paired with sleek white cabinets. Their reflective surfaces catch the light, creating a dynamic visual contrast that enhances the overall aesthetic of the room. Incorporating these tiles as a backsplash not only elevates the design but also brings a modern, chic touch to traditional cabinet styles.
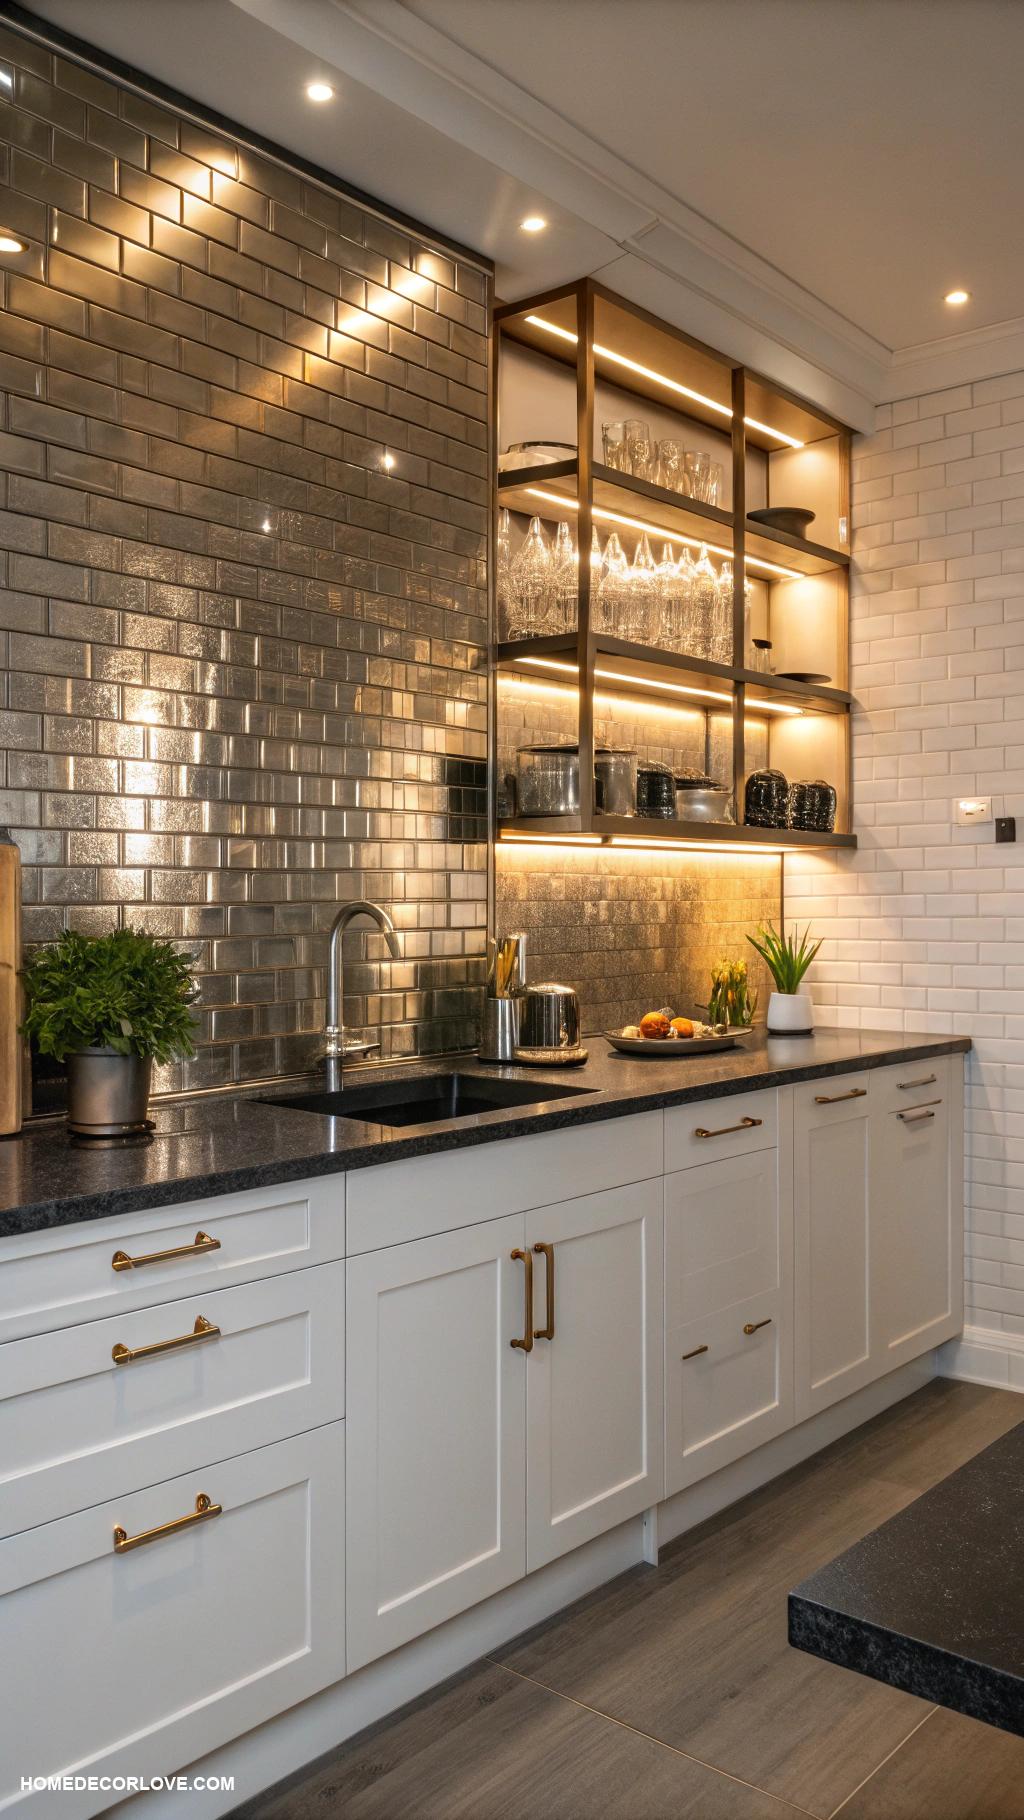
To achieve the metallic tile look in your kitchen, start by selecting tiles that match your desired color palette and finish. Remove any existing backsplash and ensure the wall surface is clean and smooth. Apply a layer of tile adhesive and begin placing the metallic tiles, aligning them carefully. Grout the tiles once the adhesive has dried, choosing a grout color that complements the metallic finish. Finally, seal the grout to protect it from moisture and enhance the shine of your new backsplash.
Simple Painted Wall with Texture
A simple painted wall with texture can elevate your kitchen backsplash while complementing white cabinets beautifully. The subtle texture adds depth and interest, creating a modern yet cozy atmosphere. This look is not only stylish but also easy to achieve with the right technique and materials.
1. Start by cleaning the wall surface to ensure proper paint adhesion. 2. Choose a paint color that complements your white cabinets; light grays or soft pastels work well. 3. Apply a base coat of paint and allow it to dry completely. 4. To create texture, use a sponge or a textured roller to apply a second coat of paint lightly. 5. Experiment with different techniques, such as rag rolling or stippling, to achieve your desired effect. 6. Finish with a clear sealant to protect the texture and enhance durability.
Woven Bamboo for Eco-Friendly Look
Woven bamboo is an excellent choice for achieving an eco-friendly aesthetic in your kitchen. Its natural texture and warm tones complement white cabinets beautifully, adding a touch of organic charm to your space. This sustainable material not only enhances your decor but also promotes environmental consciousness.

1. Measure the area of your backsplash to determine how much woven bamboo material you will need. 2. Purchase high-quality woven bamboo panels or sheets from a reputable supplier. 3. Prepare the wall surface by cleaning it thoroughly and ensuring it is smooth. 4. Apply a strong adhesive or construction glue to the back of the bamboo panels. 5. Carefully position the panels on the wall, starting from one corner and working your way across, ensuring they are level. 6. Allow the adhesive to cure as per the manufacturer’s instructions before applying any finishing touches or sealants.
Chalkboard Paint for Creative Flair
Chalkboard paint adds a unique and playful touch to any kitchen backsplash, especially when paired with classic white cabinets. This versatile paint allows for creative moments, transforming your space into a canvas for recipes, notes, or drawings. It’s not just functional; it also brings a modern, artistic flair to your home decor.
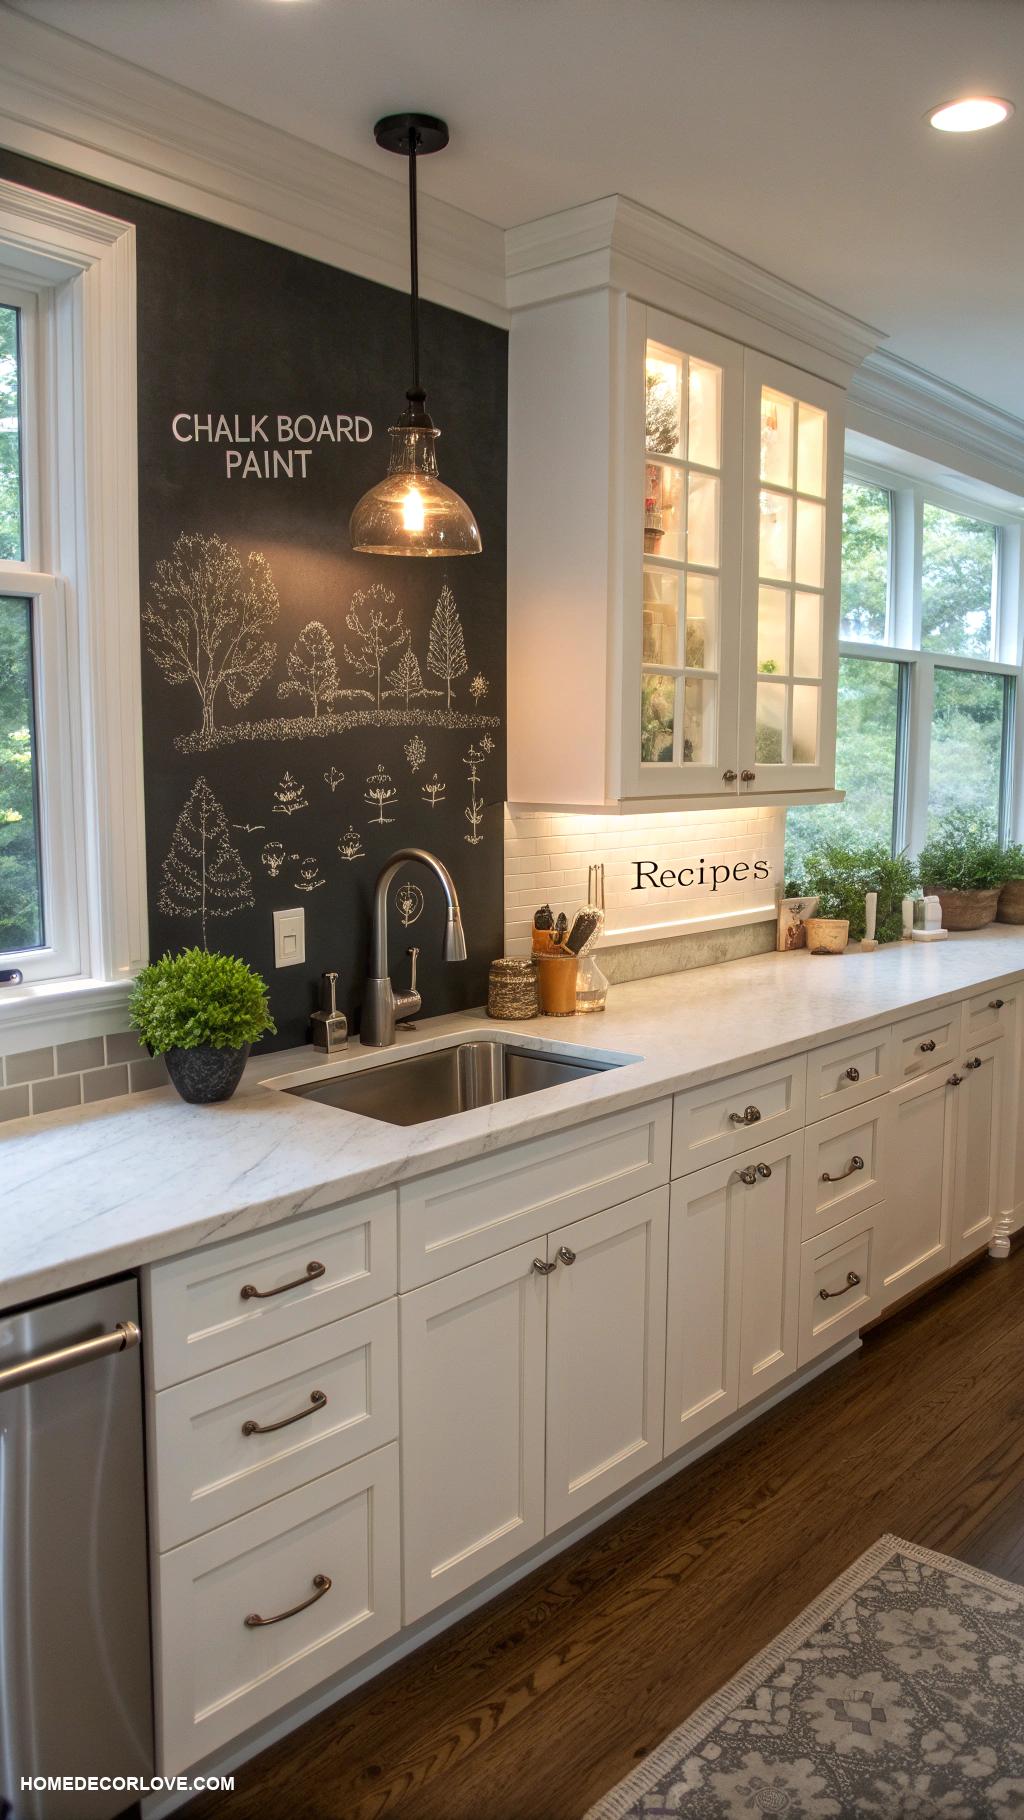
To achieve this look, start by cleaning your backsplash area thoroughly to ensure the paint adheres well. Next, tape off the edges to create clean lines and prevent paint from getting on your cabinets. Apply a coat of chalkboard paint using a roller or brush, allowing it to dry according to the manufacturer’s instructions, and then apply a second coat for even coverage. Once fully dry, season the surface by rubbing the side of a chalk piece over it and then wiping it off, which will prepare it for use. Finally, feel free to write or draw on your new chalkboard backsplash to personalize your kitchen!